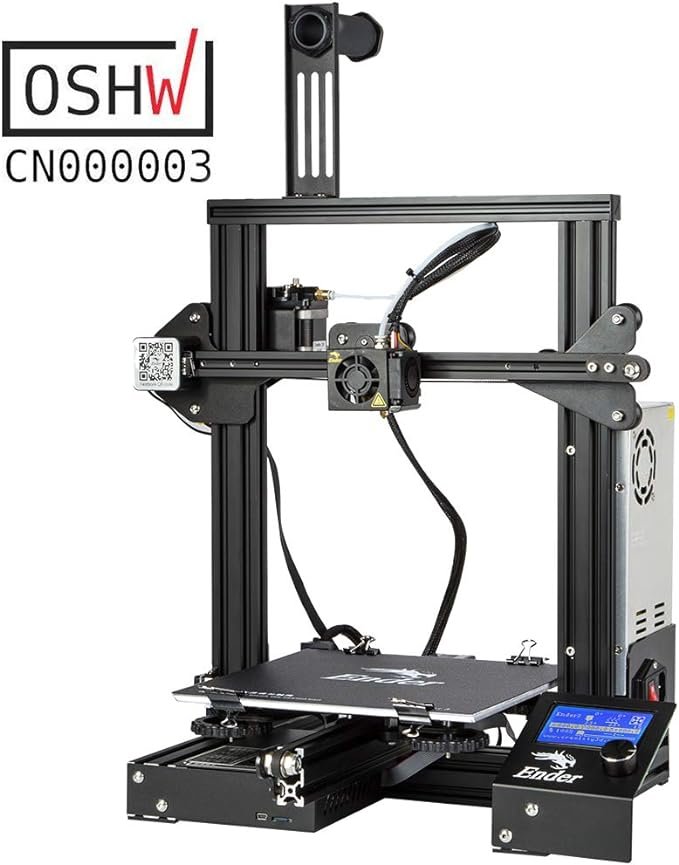
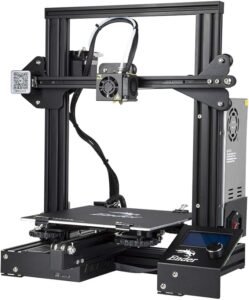
Among the several 3D printers available in the market, the Creality Ender 3 stands out as a highly popular and affordable choice for both beginners and enthusiasts. Known for its impressive performance, large build volume, and open-source capabilities, the Ender 3 has become a favorite in the 3D printing community.
This article aims to provide an in-depth review of the Creality Ender 3 3D printer. We will explore its key features, assembly process, performance, and print quality.
Whether you are a beginner looking to dive into the world of 3D printing or an experienced user seeking a reliable and cost-effective printer, this comprehensive review will help you make an informed decision about the Creality Ender 3.

Specifications:
- Brand: Comgrow
- Material: Aluminum
- Product Dimensions: 17.32 inches (Depth) x 17.32 inches (Width) x 18.31 inches (Height)
- Item Weight: 15.43 pounds
- Compatible Devices: Laptop, Personal Computer
Features:
- Resume Printing Function: The Ender 3 can resume printing after a power outage or interruption, ensuring your projects are not ruined by unexpected power issues.
- Easy and Quick Assembly: With several pre-assembled parts, the Ender 3 can be fully assembled in about 2 hours by tightening 20 nuts.
- Advanced Extruder Technology: The upgraded extruder significantly reduces the risk of clogs and poor extrusion. The V-shaped design with POM wheels ensures smooth, quiet, and durable movement.
- Safety-Protected Power Supply: The hot bed heats up to 100 degrees in just 5 minutes, enhancing efficiency and safety.
- Strict Testing: Each key component undergoes rigorous testing before delivery, and lifetime technical support is available for users.
Assembly and Setup
Assembly Process
The Creality Ender 3 comes as a semi-assembled kit, making the assembly process straightforward and manageable. With clear instructions and several pre-assembled parts, you can have your printer ready in about 2 hours by tightening just 20 nuts. This user-friendly approach ensures that even beginners can put the printer together without much hassle.
Setup Instructions
Once assembled, setting up the Ender 3 is a simple process. Start by leveling the bed, which is crucial for ensuring good print adhesion and quality. This involves adjusting the bed screws until the nozzle is at the correct distance from the bed surface. Next, load the filament by feeding it through the extruder and into the nozzle. The printer’s interface guides you through these steps, making the setup process intuitive and quick.
First Print
For a successful first print, it’s essential to choose the right settings and materials. Begin with a simple test print, like a calibration cube, to fine-tune your printer. Use recommended settings such as a layer height of 0.2 mm, a printing speed of 50 mm/s, and a bed temperature suitable for your filament type (e.g., 60°C for PLA). These settings help ensure good adhesion and print quality, setting you up for success from your very first print.
Performance and Print Quality
Print Accuracy
The Creality Ender 3 is renowned for its impressive print accuracy and detail resolution. Capable of achieving layer heights as fine as 0.1 mm, it produces highly detailed and precise prints. Users consistently praise the Ender 3 for its ability to handle intricate designs and complex geometries with ease, delivering professional-quality results.
Print Speed
The Ender 3 offers a balanced approach to print speed and quality. With a maximum print speed of 180 mm/s, it can produce models relatively quickly. However, for optimal quality, a more conservative speed of around 50 mm/s is recommended. This balance allows users to achieve smooth surfaces and fine details without sacrificing too much time.
Material Compatibility
One of the strengths of the Ender 3 is its compatibility with a variety of filament materials. It handles PLA, ABS, PETG, TPU, and more with ease. PLA is often recommended for beginners due to its ease of use and minimal warping. ABS offers higher strength and temperature resistance but requires better bed adhesion. PETG combines the best of both PLA and ABS, offering good strength and flexibility. Each material performs well on the Ender 3, allowing users to choose the best option for their specific project needs.
Maintenance and Upgrades
Maintenance Tips
Keeping your Creality Ender 3 in top condition involves regular maintenance to ensure optimal performance and longevity. Here are some essential tips:
- Regular Cleaning: Clean the build surface regularly to remove any leftover filament or debris. This helps improve adhesion and print quality. Use isopropyl alcohol and a soft cloth to wipe down the bed.
- Lubrication: Apply lubricant to the printer’s moving parts, such as the Z-axis screw, X and Y axis rods, and the V-slot wheels, to ensure smooth and quiet operation. Use a light machine oil or lithium grease.
- Nozzle Maintenance: Periodically clean the nozzle to prevent clogs. Use a small wire brush to remove any filament residue. If necessary, perform a cold pull to clear out any stubborn clogs.
- Belt Tension: Check and adjust the tension of the X and Y axis belts. Properly tensioned belts reduce vibrations and improve print accuracy.
- Firmware Updates: Keep the printer’s firmware up to date to benefit from the latest features and improvements. Visit the Creality website for the latest firmware versions.
Popular Upgrades
Enhancing the capabilities of your Ender 3 is possible with various upgrades and modifications. Here are some popular options:
- Auto Bed Leveling: Adding a BLTouch or another auto bed leveling sensor simplifies the leveling process, improving print consistency and reducing the need for manual adjustments.
- All-Metal Hotend: Upgrading to an all-metal hotend allows the Ender 3 to handle higher temperatures and a wider range of filaments, including those that require higher extrusion temperatures like nylon and polycarbonate.
- Silent Motherboard: Replacing the stock motherboard with a silent motherboard, such as the Creality V4.2.7, significantly reduces noise during operation, making the printer much quieter.
- Glass Bed: Installing a glass bed improves adhesion and provides a flatter surface for printing, which can enhance the quality of the first layer and reduce warping.
- Dual Z-Axis Upgrade: Adding a second Z-axis leadscrew improves stability and reduces wobbling, especially for taller prints, resulting in better overall print quality.
- Filament Guide and Holder: Upgrading the filament guide and holder can improve filament feeding and reduce the chances of tangles or jams.
- Improved Cooling: Installing a more powerful or dual fan cooling system enhances cooling efficiency, improving print quality, especially for overhangs and bridging.
Frequently Asked Questions
Regular maintenance is crucial for optimal performance. Clean the build surface before each print to ensure good adhesion, and perform a more thorough cleaning every few weeks. Lubricate moving parts every few months, and check for belt tension and nozzle cleanliness as needed. Keeping up with these tasks will help prevent common issues and extend the life of your printer.
An auto bed leveling sensor, such as a BLTouch, simplifies the bed leveling process by automatically measuring the distance between the nozzle and bed at multiple points. This ensures a perfectly leveled bed with minimal manual adjustment, improving print quality and consistency. It’s especially useful for reducing the time and effort involved in achieving proper bed adhesion.
The Ender 3 can handle various filaments, but for high-temperature materials like nylon or polycarbonate, an all-metal hotend upgrade is recommended. The stock hotend may struggle with higher temperatures and can cause clogs or poor extrusion. An all-metal hotend allows for higher extrusion temperatures, expanding your material options.
Upgrading to a silent motherboard, such as the Creality V4.2.7, reduces the noise generated by the printer during operation. This upgrade incorporates quieter stepper motor drivers, resulting in a much quieter printing experience. It’s ideal for home environments where noise can be a concern or for users who prefer a quieter workspace.
To perform a cold pull, heat the nozzle to the temperature used for the filament you were printing. Insert a piece of filament into the nozzle and then cool it down quickly to just below the extrusion temperature. Pull out the filament slowly, it should bring any residual filament and debris with it. This method helps clear stubborn clogs and keeps the nozzle clean for better print quality.